Build a Glowing Web Signboard in Two Hours: The NeonCraft Walk-Through
NeonCraft
1. Why You Are Here
-
“I need a neon-style title for my live stream but don’t want After Effects.” -
“I only know basic front-end—can I still finish something in two hours?” -
“How do I change colors, add hand-drawn shapes, and make the text breathe or flicker?”
This article turns the original technical blueprint into plain English. By the end you will:
-
Run a fully editable, full-screen neon signboard in any modern browser. -
Understand which Konva API call sits behind every button. -
Tweak colors, fonts, or animation speed without touching the source code.
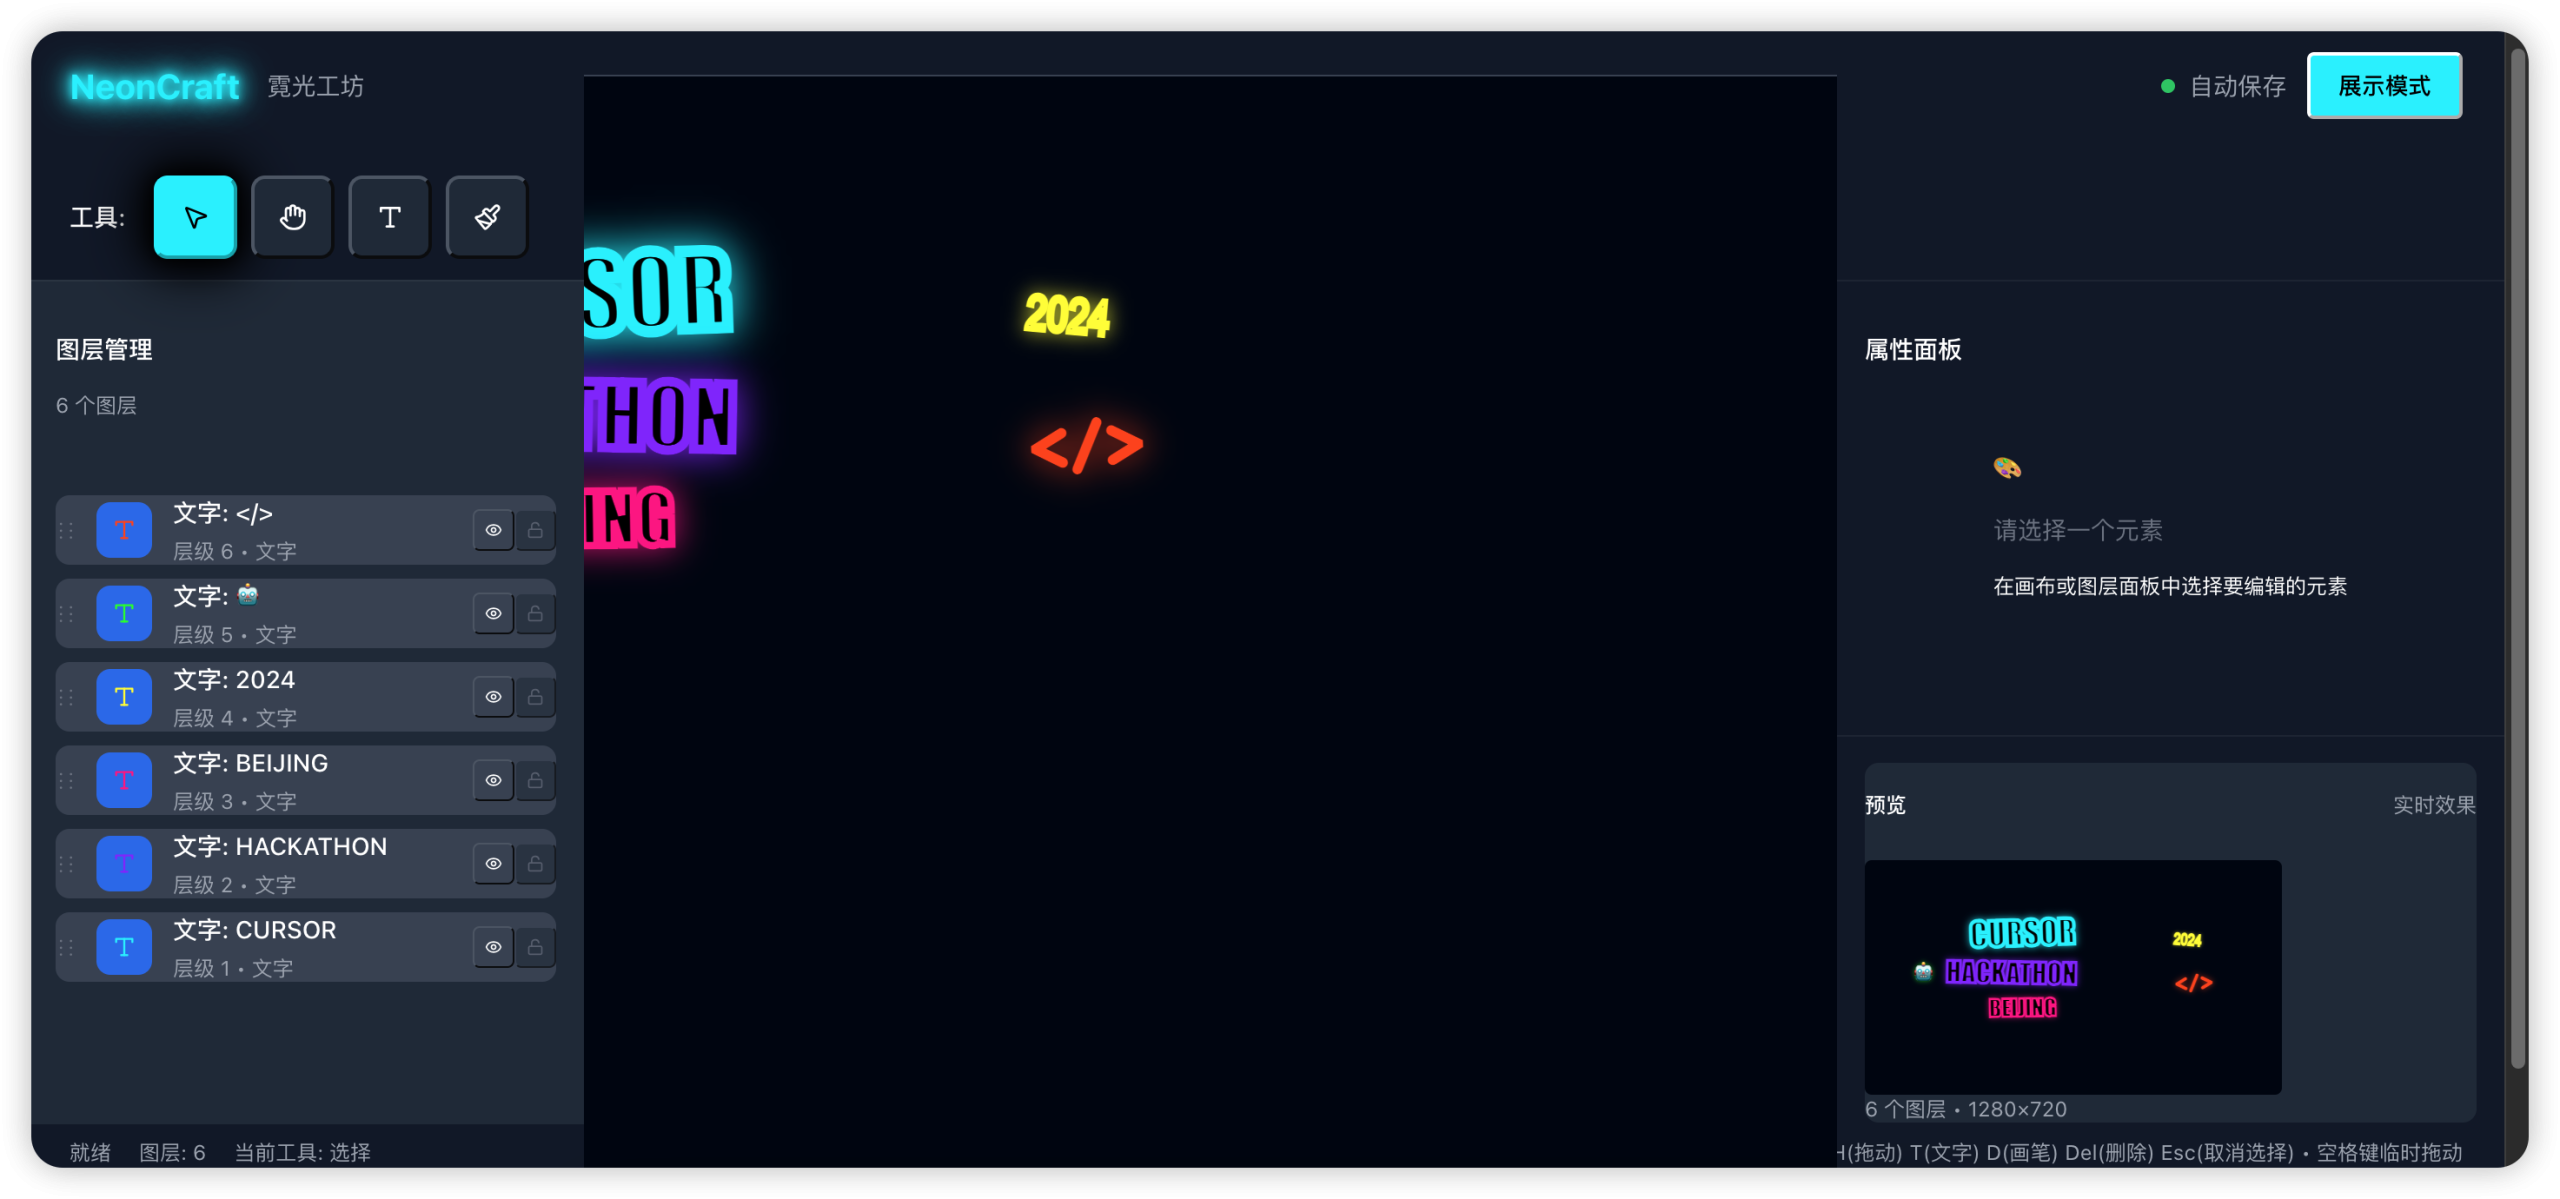
2. What Exactly Is NeonCraft?
A single-page web tool that lets you design and play digital neon signs.
-
Edit Mode: drag text, sketch shapes, adjust glow, thickness, and color. -
Show Mode: one-click full screen with looping “breathe” or “flicker” effects—just like real storefront neon. -
Tech Footprint: 100 % front end—React, Konva, Zustand—no server required.
3. The Two-Hour Roadmap (Straight from the Docs)
| Minutes | You Will Do | Key Deliverable |
|---|---|---|
| 0–15 | Spin up the dev server | Empty dark canvas appears |
| 15–45 | Add text, drag it, change color | First “NEON” on screen |
| 45–75 | Draw a free-hand lightning bolt | Glowing curved line |
| 75–90 | Refresh the page—nothing lost | Auto-save to localStorage |
| 90–105 | Click “Show” → full-screen play | Breathing animation runs |
| 105–120 | Polish: default background, demo scene | Screenshot-ready demo |
4. Quick Start (Three Commands Only)
Prerequisite: Node ≥ 16 installed.
# 1. Clone
git clone <repo-url>
cd neoncraft

# 2. Install
npm install

# 3. Run
npm run dev
Your browser opens http://localhost:5173. A dark canvas means success.
5. Tech Choices Explained
| Tool | Job | Why Not Something Else? |
|---|---|---|
| React + Vite | Fastest dev server and HMR | Vue would work, but React has more samples |
| Konva + react-konva | Canvas 2D with built-in glow via shadowBlur |
Fabric is heavier; PixiJS needs WebGL |
| Zustand | Global state in ten lines | Redux boilerplate is overkill |
| localStorage | Zero-backend persistence | Cloud sync can come later |
6. Data Model in One Glance
interface Scene {
  name: string;               // Name of your sign
  width: 1280; height: 720;  // Canvas size
  background: { color: '#0B0F1A' };  // Deep dark blue
  global: {
    brightness: 1;           // Global brightness 0–2
    animation: 'breathe' | 'flicker';
    animSpeed: 0.6;
  };
  nodes: Array<TextNode | PathNode>;
}
-
Every node has a unique idfor selection, deletion, and re-ordering. -
glow.blurcontrols halo spread;glow.intensitysets halo opacity.
7. Edit Mode Step-by-Step
7.1 Adding Text
// store/scene.ts
function addText() {
  const node: TextNode = {
    id: crypto.randomUUID(),
    type: 'text',
    text: 'NEON',
    x: 460, y: 260,
    stroke: '#00F0FF',
    strokeWidth: 10,
    fontSize: 120,
    glow: { enabled: true, blur: 40, intensity: 0.9 }
  };
  set(state => ({ nodes: [...state.nodes, node] }));
}
-
One click on the canvas drops the default text. -
The right-hand panel instantly syncs color, font size, and glow.
7.2 Free-Hand Drawing
startDraw() {
  isDrawing = true;
  currentPoints = [];
}

pushPoint(x, y) {
  if (isDrawing) currentPoints.push(x, y);
}

endDraw() {
  const path: PathNode = {
    id: crypto.randomUUID(),
    type: 'path',
    points: [...currentPoints],
    tension: 0.5,     // Smooth curve
    closed: false,
    stroke: '#FF00FF',
    strokeWidth: 8,
    glow: { enabled: true, blur: 30, intensity: 0.8 }
  };
  addNode(path);
}
-
Hold mouse down and drag to draw; release to finalize. -
Konva’s Linewithtensiongives smooth curves without extra math.
7.3 Selection and Transformation
-
Click any element → selectedIdupdates →Konva.Transformershows handles. -
Drag, rotate, and scale are handled by Konva; no matrix math required.
8. Show Mode: Three Lines to Animate
-
Route switches to /play; toolbars hide. -
Full-screen API invoked: document.documentElement.requestFullscreen(). -
Animation loop with requestAnimationFrame:
function animate() {
  const t = (Math.sin(Date.now() * speed) + 1) / 2; // 0–1 sine wave
  const brightness = 0.8 + t * 0.4;                  // 0.8–1.2
  stageRef.current.container().style.filter =
    `brightness(${brightness}) hue-rotate(${global.hueRotate}deg)`;
  requestAnimationFrame(animate);
}
-
Flicker mode replaces the sine wave with pseudo-random noise. -
Hue slider feeds directly into CSS hue-rotate(), so no per-node color updates.
9. Save & Load via localStorage
// Auto-save with 500 ms debounce
useEffect(() => {
  const timer = setTimeout(() => {
    localStorage.setItem('neoncraft:scene', JSON.stringify(scene));
  }, 500);
  return () => clearTimeout(timer);
}, [scene]);

// Load on first visit
const saved = localStorage.getItem('neoncraft:scene');
if (saved) setScene(JSON.parse(saved));
10. Frequently Asked Questions
Q1. How do I use Chinese or other fonts?
Add fontFamily: 'Noto Sans SC' to the TextNode and preload the Google Font in index.html.
Q2. Large canvas slows my phone.
Cap the canvas at 720p and keep shadowBlur < 60; Konva will clip pixels automatically.
Q3. Export a PNG?
const dataURL = stageRef.current.toDataURL({ pixelRatio: 2 });
const link = document.createElement('a');
link.download = 'my-neon.png';
link.href = dataURL;
link.click();
Q4. Can I drive real LED strips?
The README lists hardware linkage as out-of-scope. Conceptually, serialize the Scene to JSON, send via WebSocket to a Raspberry Pi, and map coordinates to WS2812B pixels.
Q5. I don’t know Zustand.
Swap the store for React’s built-in useReducer; keep the data shape identical—only boilerplate increases.
11. First-Run Demo Data
Paste the following into the browser’s localStorage under key neoncraft:scene, refresh, and the official demo appears:
{
  "id": "demo-1",
  "name": "NeonCraft Demo",
  "width": 1280,
  "height": 720,
  "background": { "color": "#0B0F1A" },
  "global": { "brightness": 1, "hueRotate": 0, "animation": "breathe", "animSpeed": 0.6 },
  "nodes": [
    {
      "id": "t1",
      "type": "text",
      "text": "NEON",
      "x": 460, "y": 260,
      "stroke": "#00F0FF", "strokeWidth": 10,
      "glow": { "enabled": true, "blur": 40, "intensity": 0.9 },
      "fontSize": 120
    }
  ]
}
12. Next Steps Beyond Two Hours
-
Add an “Export GIF” button: record the canvas with MediaRecorder. -
Build a template gallery: save multiple Sceneobjects to cloud storage. -
Connect a microphone: map volume to brightnessvia Web Audio API for music-reactive neon.
Keep this article bookmarked. When the next hackathon countdown hits 120 minutes, you can confidently say, “Give me two hours—I’ll build a glowing sign right here, right now.”
