

The Core Question This Article Answers
This comprehensive guide addresses a fundamental question for developers worldwide: How can you effectively leverage Kimi For Coding—the intelligent programming assistant—to significantly enhance your personal development productivity? We’ll explore its core benefits, configuration across various development environments, and real-world implementation strategies.
In today’s rapidly evolving technological landscape, developers face increasingly complex programming challenges and tight project deadlines. Kimi For Coding, as part of the Kimi membership benefits, provides powerful programming support and intelligent features for individual developers. Whether you’re an independent developer, student, or technology enthusiast, this tool can help you complete programming tasks more efficiently, reduce repetitive work, and focus on creative solutions.
Understanding Kimi For Coding Benefits
This section answers: What core benefits does Kimi For Coding offer, and what are its applicable scenarios and limitations?
Kimi For Coding is a specialized service within the Kimi membership ecosystem designed to provide intelligent programming support and capabilities. Through advanced AI technology, this service assists developers in efficiently completing various programming tasks across multiple phases—from code writing and debugging to project refactoring.
Key Benefit Highlights:
-
Specifically designed for personal development scenarios, not enterprise development -
Usable within Kimi CLI and officially approved Coding Agents -
Costs included in Kimi membership with no additional fees -
Provides dedicated API Key for programming-related scenarios
Practical Application Scenario: Imagine you’re developing a personal blog system. You can use Kimi For Coding to quickly generate frontend components, optimize database query code, or help debug complex JavaScript functions. This assistance significantly reduces time spent on documentation review and code debugging, allowing you to focus more on business logic implementation.
Important Usage Limitations:
Enterprise development requirements should be directed to Moonshot Open Platform, which supports prepaid pay-as-you-go models and specific model selection, catering to broader enterprise usage scenarios and product integration needs. This distinction ensures individual developers access high-quality programming assistance at reasonable costs while providing enterprises with more professional and stable services.
Pricing Structure and Quota Management
This section answers: How does Kimi For Coding pricing work, and how are usage quotas refreshed?
Kimi For Coding employs a developer-friendly pricing approach where all costs are included within the Kimi membership package. When members use API Keys generated from their membership page on approved platforms for programming, the system only consumes request counts from their package quota, with regular quota refreshes.
Detailed Pricing Logic:
-
Using membership-specific API Keys on approved platforms consumes package request counts -
Different membership tiers offer varying request quotas (check membership page for details) -
No additional charges required specifically for Kimi For Coding service
Quota Refresh Mechanism:
Starting from subscription date D1, request quotas refresh following this pattern:
-
Immediate access to first week’s quota upon subscription activation, valid from D1 to D7 -
Automatic quota refresh on D8, valid from D8 to D14 -
Subsequent weekly refreshes following the same pattern
This periodic quota refresh mechanism ensures developers can continuously use the service while reasonably distributing their usage frequency. For instance, when working on a complex personal project, you can schedule development tasks within refresh cycles to ensure adequate request quota availability during critical development phases.
Supported Platforms and Usage Scope
This section answers: Which development environments support Kimi For Coding?
Kimi For Coding is primarily designed for Kimi CLI environment but, acknowledging developer tool diversity, officially permits usage within specific third-party Coding Agents. This flexibility enables developers to enjoy AI programming assistance within their familiar environments.
Officially Supported Platforms:
-
Kimi CLI (official command-line tool) -
Claude Code (Anthropic’s programming assistant) -
Roo Code (VS Code extension)
Practical Application Scenario: If you prefer VS Code for development, integrate Kimi For Coding through Roo Code extension configuration. For command-line workflow enthusiasts, Kimi CLI serves as the ideal choice. Developers comfortable with Anthropic’s ecosystem will find perfect compatibility with Claude Code.
Critical Usage Notes:
While Kimi For Coding usage is permitted in Claude Code and Roo Code, employing corresponding base_url and API Keys in non-approved products may be considered abuse and violation, potentially leading to membership benefit suspension or account termination. Therefore, developers should strictly use the service within officially approved boundaries.
Environment Configuration and Detailed Usage Guide
Configuring Kimi For Coding in Claude Code
This section answers: How to install and configure Kimi For Coding in Claude Code?
Claude Code, Anthropic’s programming assistant tool, maintains excellent compatibility with Kimi For Coding. The configuration process is relatively straightforward but requires careful step-by-step implementation to ensure proper setup.
Installing Claude Code:
For macOS & Linux Users:
# Install nodejs on MacOS and Linux
curl -fsSL https://fnm.vercel.app/install | bash

# Open a new terminal for fnm to take effect
fnm install 24.3.0
fnm default 24.3.0
fnm use 24.3.0

# Install claude-code
npm install -g @anthropic-ai/claude-code --registry=https://registry.npmmirror.com

# Initialize configuration
node --eval "
    const homeDir = os.homedir();
    const filePath = path.join(homeDir, '.claude.json');
    if (fs.existsSync(filePath)) {
        const content = JSON.parse(fs.readFileSync(filePath, 'utf-8'));
        fs.writeFileSync(filePath,JSON.stringify({ ...content, hasCompletedOnboarding: true }, 2), 'utf-8');
    } else {
        fs.writeFileSync(filePath,JSON.stringify({ hasCompletedOnboarding: true }), 'utf-8');
    }"
For Windows Users:
# Open PowerShell in Windows Terminal
# Install nodejs on Windows
# Right-click Windows button, select "Terminal"

# Then execute the following sequentially
winget install OpenJS.NodeJS
Set-ExecutionPolicy -Scope CurrentUser RemoteSigned

# Close terminal window and open a new one

# Install claude-code
npm install -g @anthropic-ai/claude-code --registry=https://registry.npmmirror.com

# Initialize configuration
node --eval "
    const homeDir = os.homedir();
    const filePath = path.join(homeDir, '.claude.json');
    if (fs.existsSync(filePath)) {
        const content = JSON.parse(fs.readFileSync(filePath, 'utf-8'));
        fs.writeFileSync(filePath,JSON.stringify({ ...content, hasCompletedOnboarding: true }, 2), 'utf-8');
    } else {
        fs.writeFileSync(filePath,JSON.stringify({ hasCompletedOnboarding: true }), 'utf-8');
    }"
Configuring Kimi For Coding Model:
After installation completion, environment variables must be set to use Kimi For Coding model.
macOS & Linux Configuration:
export ANTHROPIC_BASE_URL=https://api.kimi.com/coding/
export ANTHROPIC_AUTH_TOKEN=<Your API Key>  # Fill in API Key from membership page
export ANTHROPIC_MODEL=kimi-for-coding
export ANTHROPIC_SMALL_FAST_MODEL=kimi-for-coding

claude
Windows Configuration:
$env:ANTHROPIC_BASE_URL="https://api.kimi.com/coding/";
$env:ANTHROPIC_AUTH_TOKEN="<Your API Key>"  # Fill in API Key from membership page
$env:ANTHROPIC_MODEL="kimi-for-coding"
$env:ANTHROPIC_SMALL_FAST_MODEL="kimi-for-coding"

claude
Verifying Configuration:
After launching Claude Code, enter /status in the command input box to confirm model status. With correct configuration, the system will display connection to Kimi For Coding model, enabling immediate development usage.
Practical Application Scenario: When adding new features to existing projects, describe requirements to Claude Code—it will provide code suggestions based on Kimi For Coding capabilities. For example, requesting “Help me create a validated form component in my React project” generates corresponding JavaScript/JSX code considering best practices and error handling.
Configuring Kimi For Coding in Roo Code
This section answers: How to configure Kimi For Coding in VS Code’s Roo Code extension?
Roo Code, a VS Code extension, offers an intuitive graphical interface for AI programming assistance. The configuration process is relatively straightforward, suitable for developers preferring integrated development environments.
Installing Roo Code:
-
Open VS Code, navigate to Extensions view ( Cmd+Shift+X/Ctrl+Shift+X) -
Search for Roo Codeand install the official extension -
After installation completion, Roo Code icon appears in activity bar; restart VS Code if not visible
Configuring Kimi For Coding Model:
-
Open Roo Code panel, navigate to settings page -
In Providers section, select Moonshot(or create custom Provider) -
Complete configuration information as prompted: -
Entrypoint: api.kimi.com/coding/v1 -
API Key: Enter Kimi For Coding API Key obtained from membership page -
Model: kimi-for-coding
-
-
Disable browser automation options if unnecessary -
Save settings and return to Roo Code main interface to create new sessions
Confirming Configuration Effectiveness:
-
Model dropdown in Roo Code sidebar should display kimi-for-coding -
If authentication fails, verify API Key completeness or regenerate in membership center
Practical Application Scenario: While writing Python data analysis scripts in VS Code, use Roo Code-integrated Kimi For Coding to optimize data processing logic or debug complex pandas operations. Directly describe problems in code comments—Roo Code will invoke Kimi For Coding to provide solutions.
Comprehensive Kimi CLI Usage Guide
This section answers: How to install, configure, and use Kimi CLI?
Kimi CLI is Moonshot AI’s self-developed command-line universal agent tool helping developers quickly complete various programming and file processing tasks. As the officially launched tool, it maintains the tightest and most stable integration with Kimi For Coding.

Installation Preparation:
Kimi CLI supports macOS and Linux systems, requiring uv package manager. If uv isn’t installed, refer to official installation instructions. Typically, macOS and Linux systems can install uv using:
curl -LsSf https://astral.sh/uv/install.sh | sh
Installing Kimi CLI:
After uv installation, use following command to install Kimi CLI:
uv tool install --python 3.13 kimi-cli
Verify successful installation with:
kimi --version
Important Note: Due to macOS security verification mechanisms, initial execution on macOS may require considerable time—please wait patiently. Try adding your terminal tool to “System Settings” – “Privacy & Security” – “Developer Tools” to trust programs running in the terminal.
Upgrading Kimi CLI:
Use following command to upgrade Kimi CLI:
uv tool upgrade kimi-cli --no-cache
Configuration and Usage:
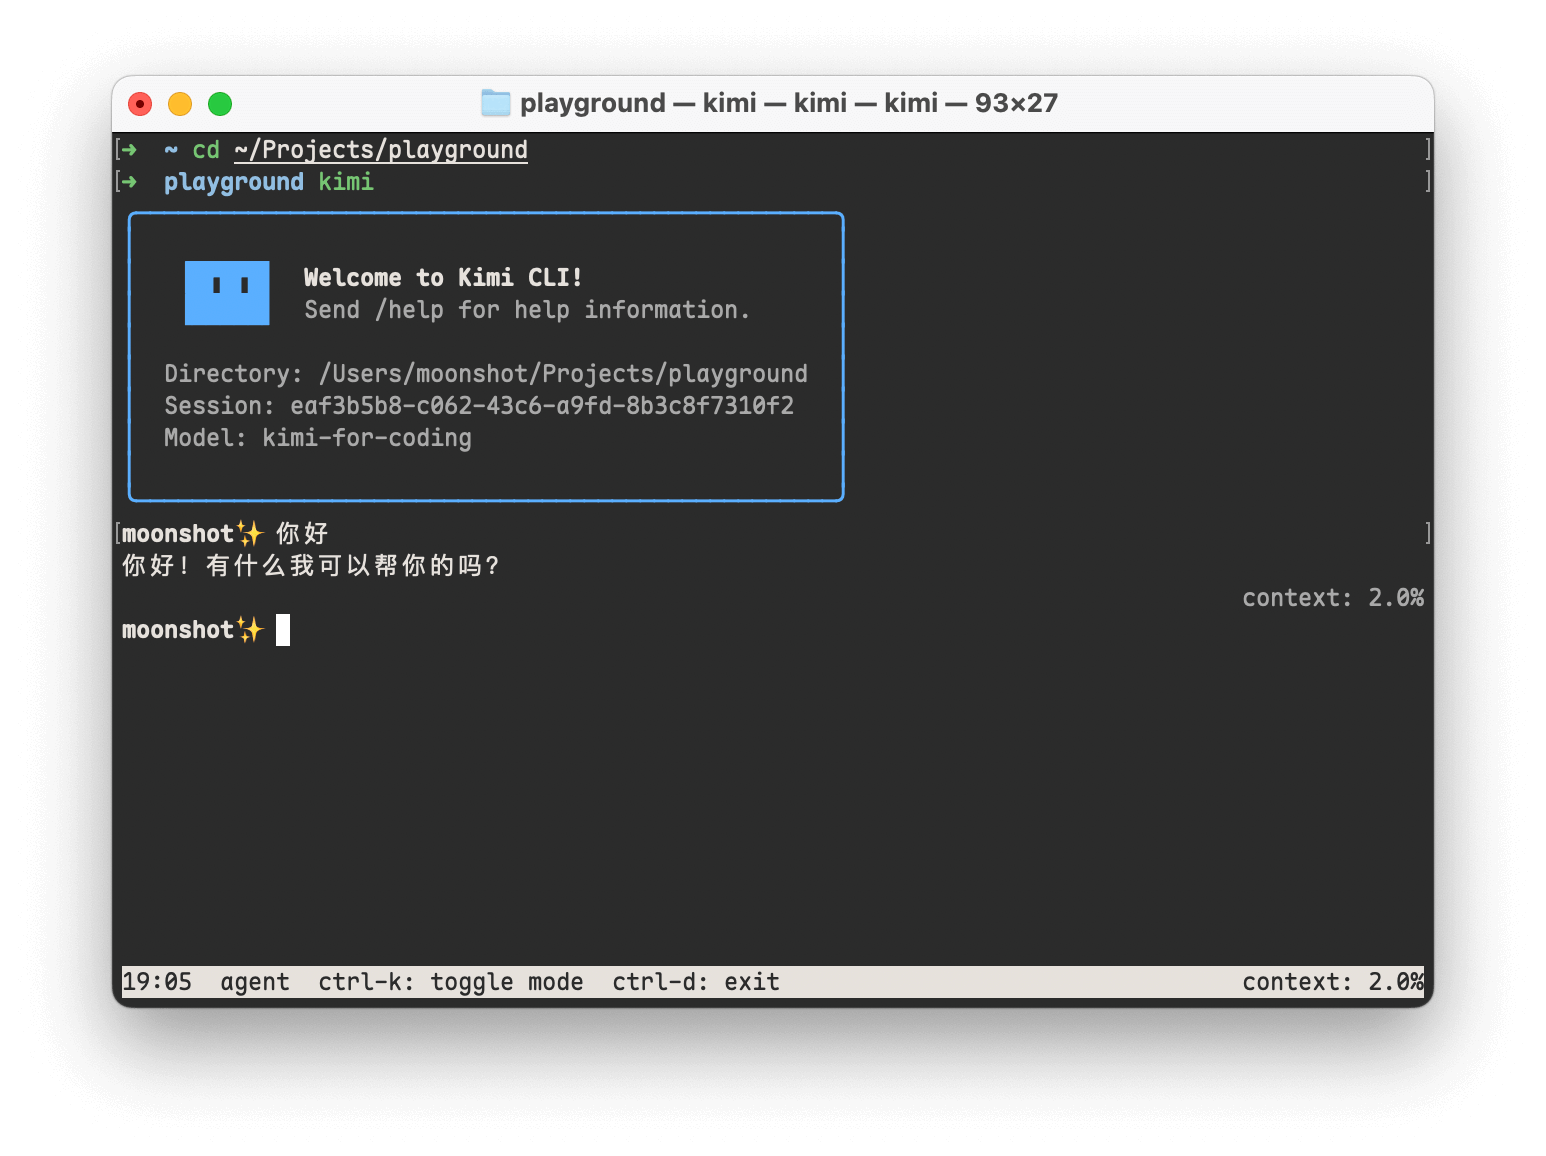
Navigate to your project directory in command line and run kimi command to launch Kimi CLI:
cd my-project
kimi
During initial execution, Kimi CLI prompts about unconfigured models—enter /setup meta-command to begin configuration:
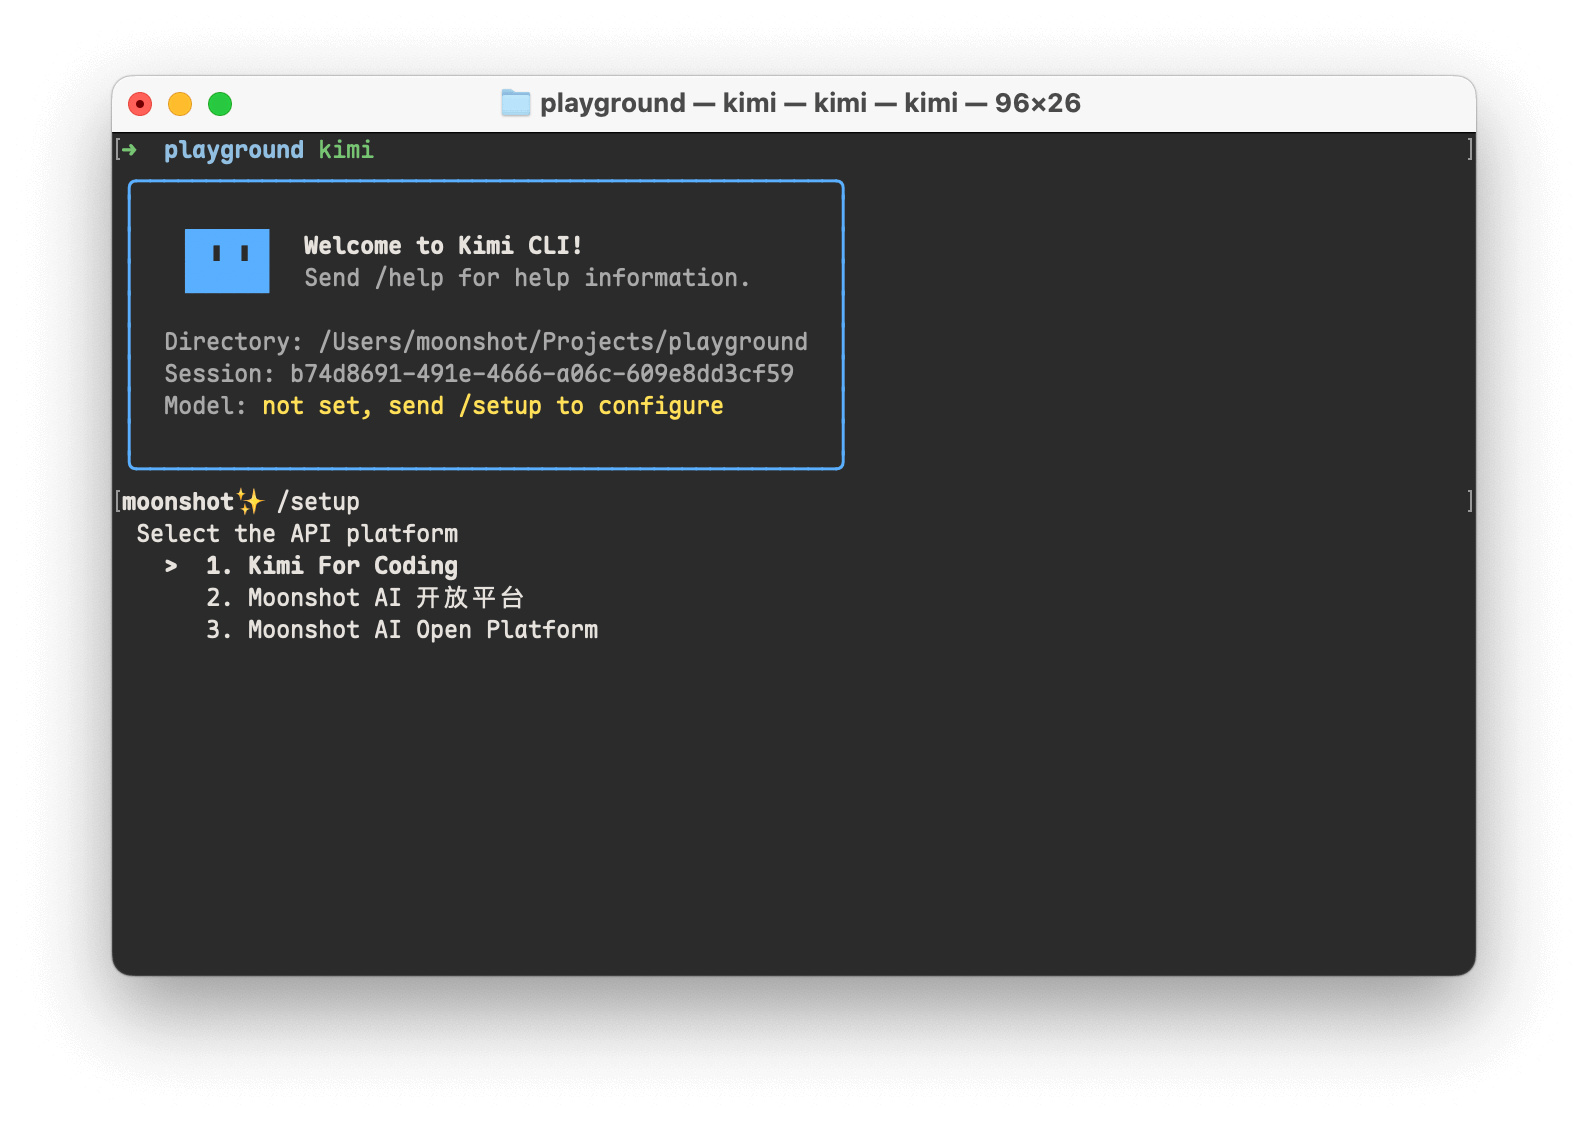
Coding membership users should select “Kimi For Coding,” then input API Key obtained from membership page and choose kimi-for-coding model when prompted.
After configuration completion, begin using Kimi CLI for various programming tasks. For example, you can request help creating game prototypes:
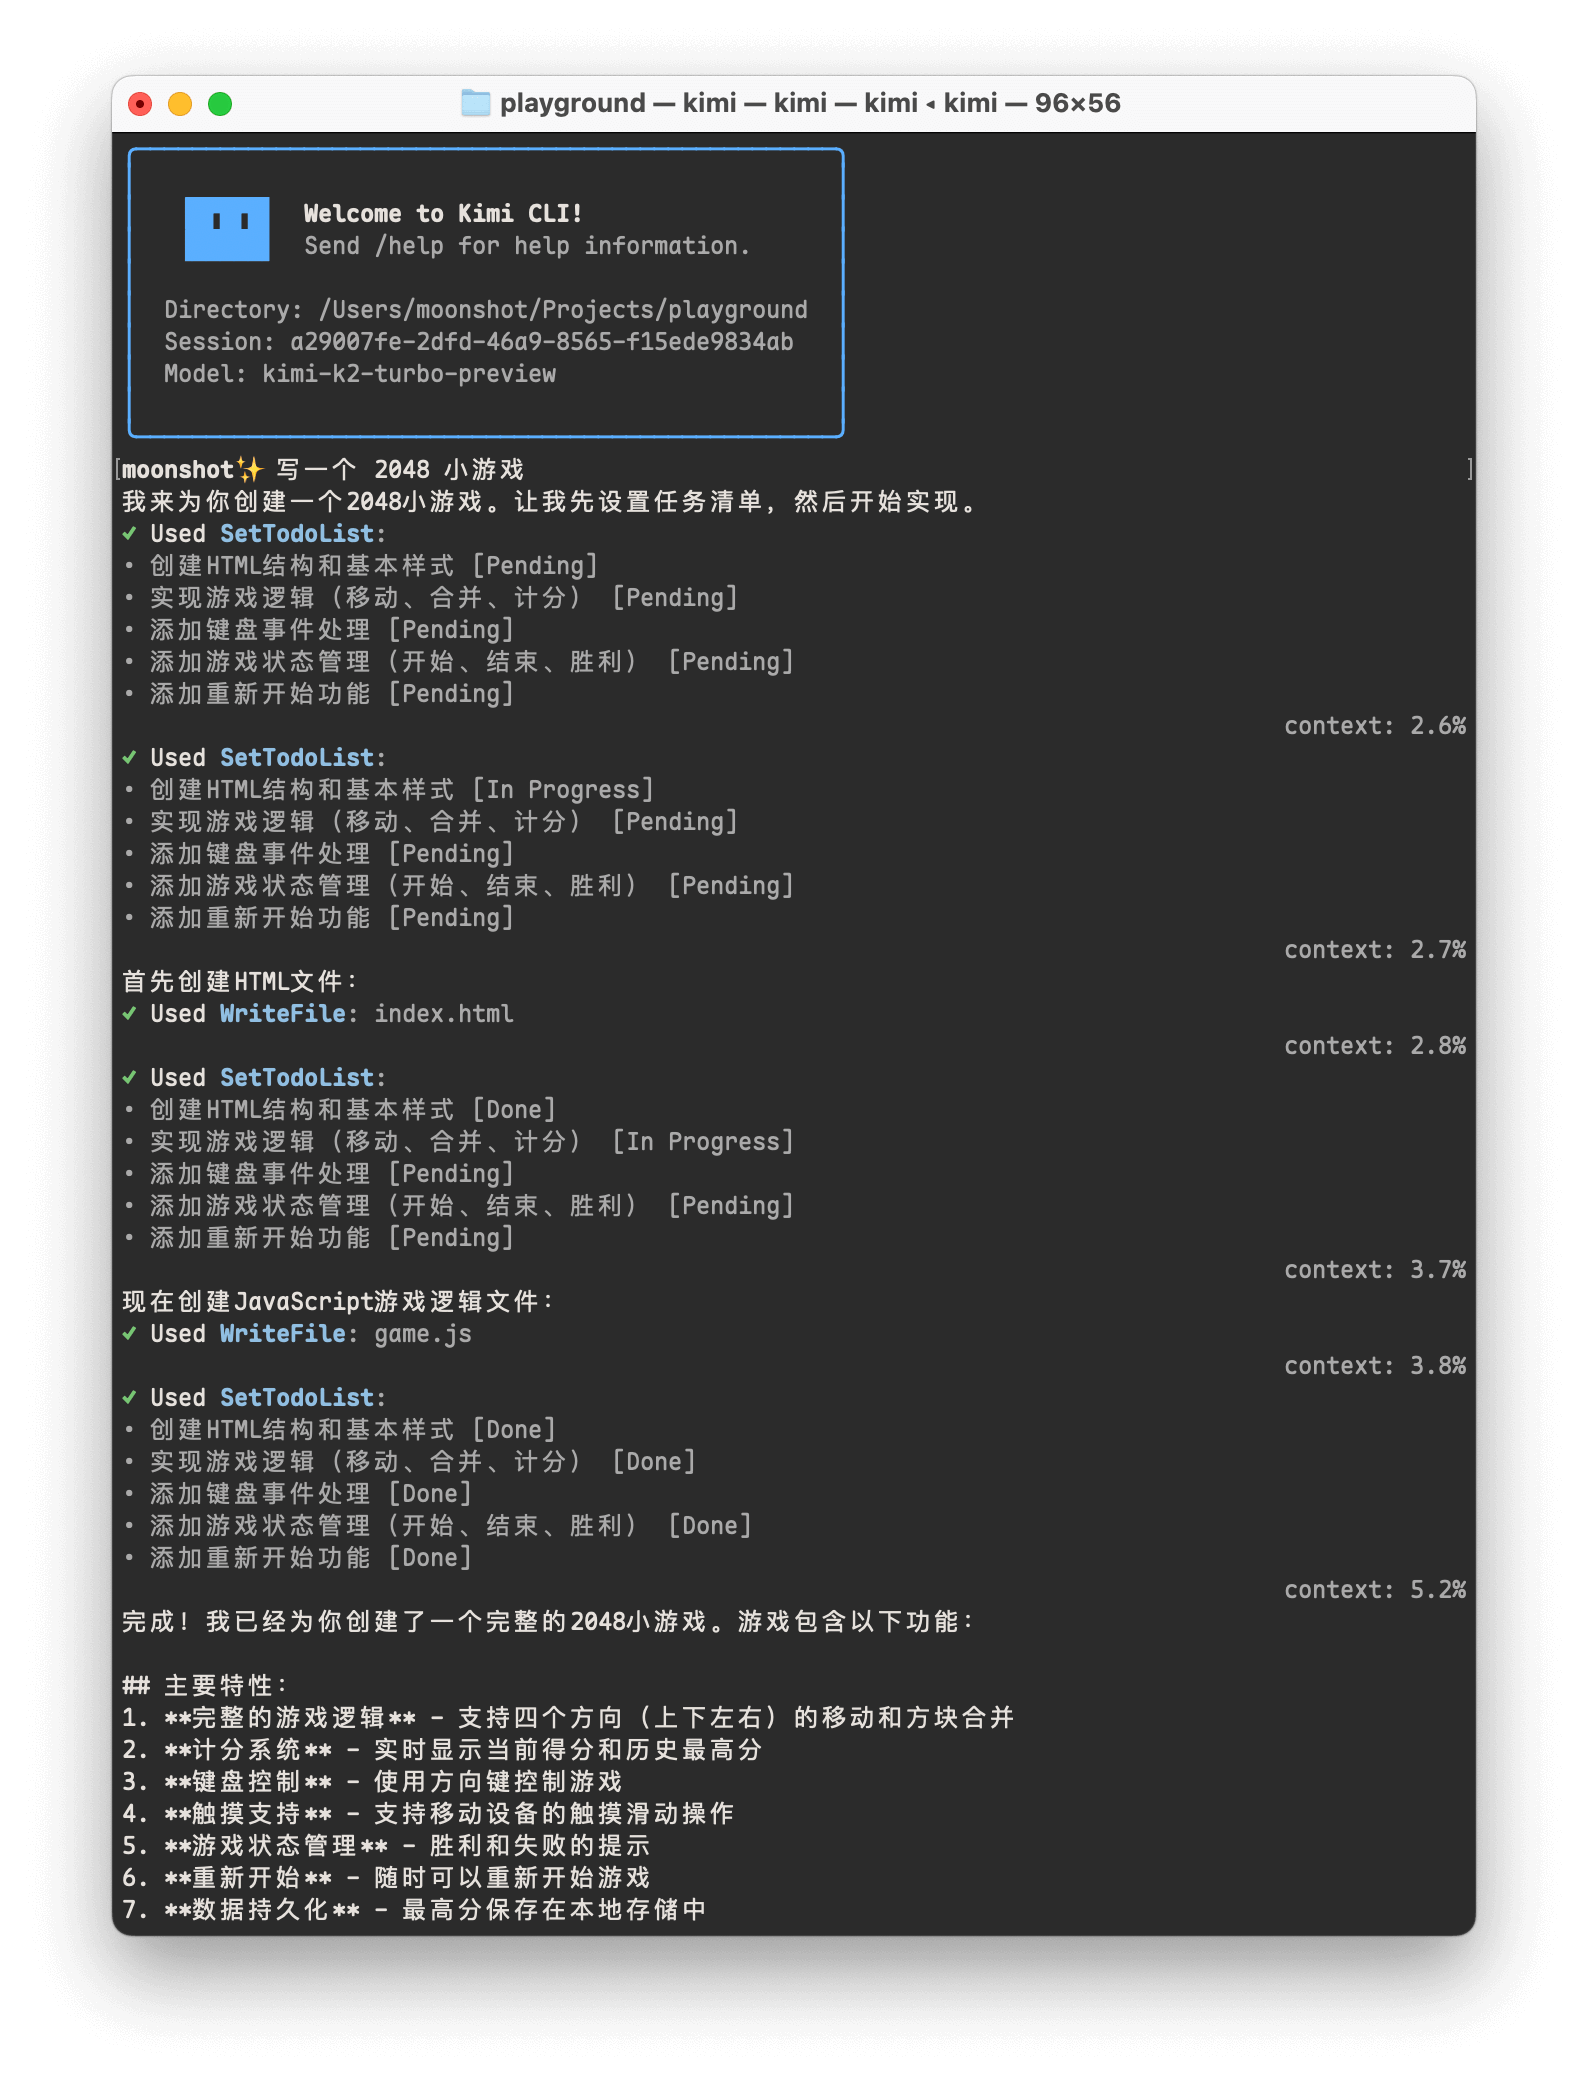
Practical Application Scenario: When needing to quickly create a simple todo application, launch Kimi CLI in project directory and describe requirements: “Create a todo web application with add, delete, and mark-complete functionality.” Kimi CLI will guide you through entire development process, generating necessary HTML, CSS, and JavaScript files while providing implementation suggestions.
Shell Mode and Advanced Features
Kimi CLI extends beyond programming assistance with powerful Shell mode. Use Ctrl-K shortcut to switch to shell mode, enabling direct shell command execution without leaving Kimi CLI—ideal for file operations and result checking.
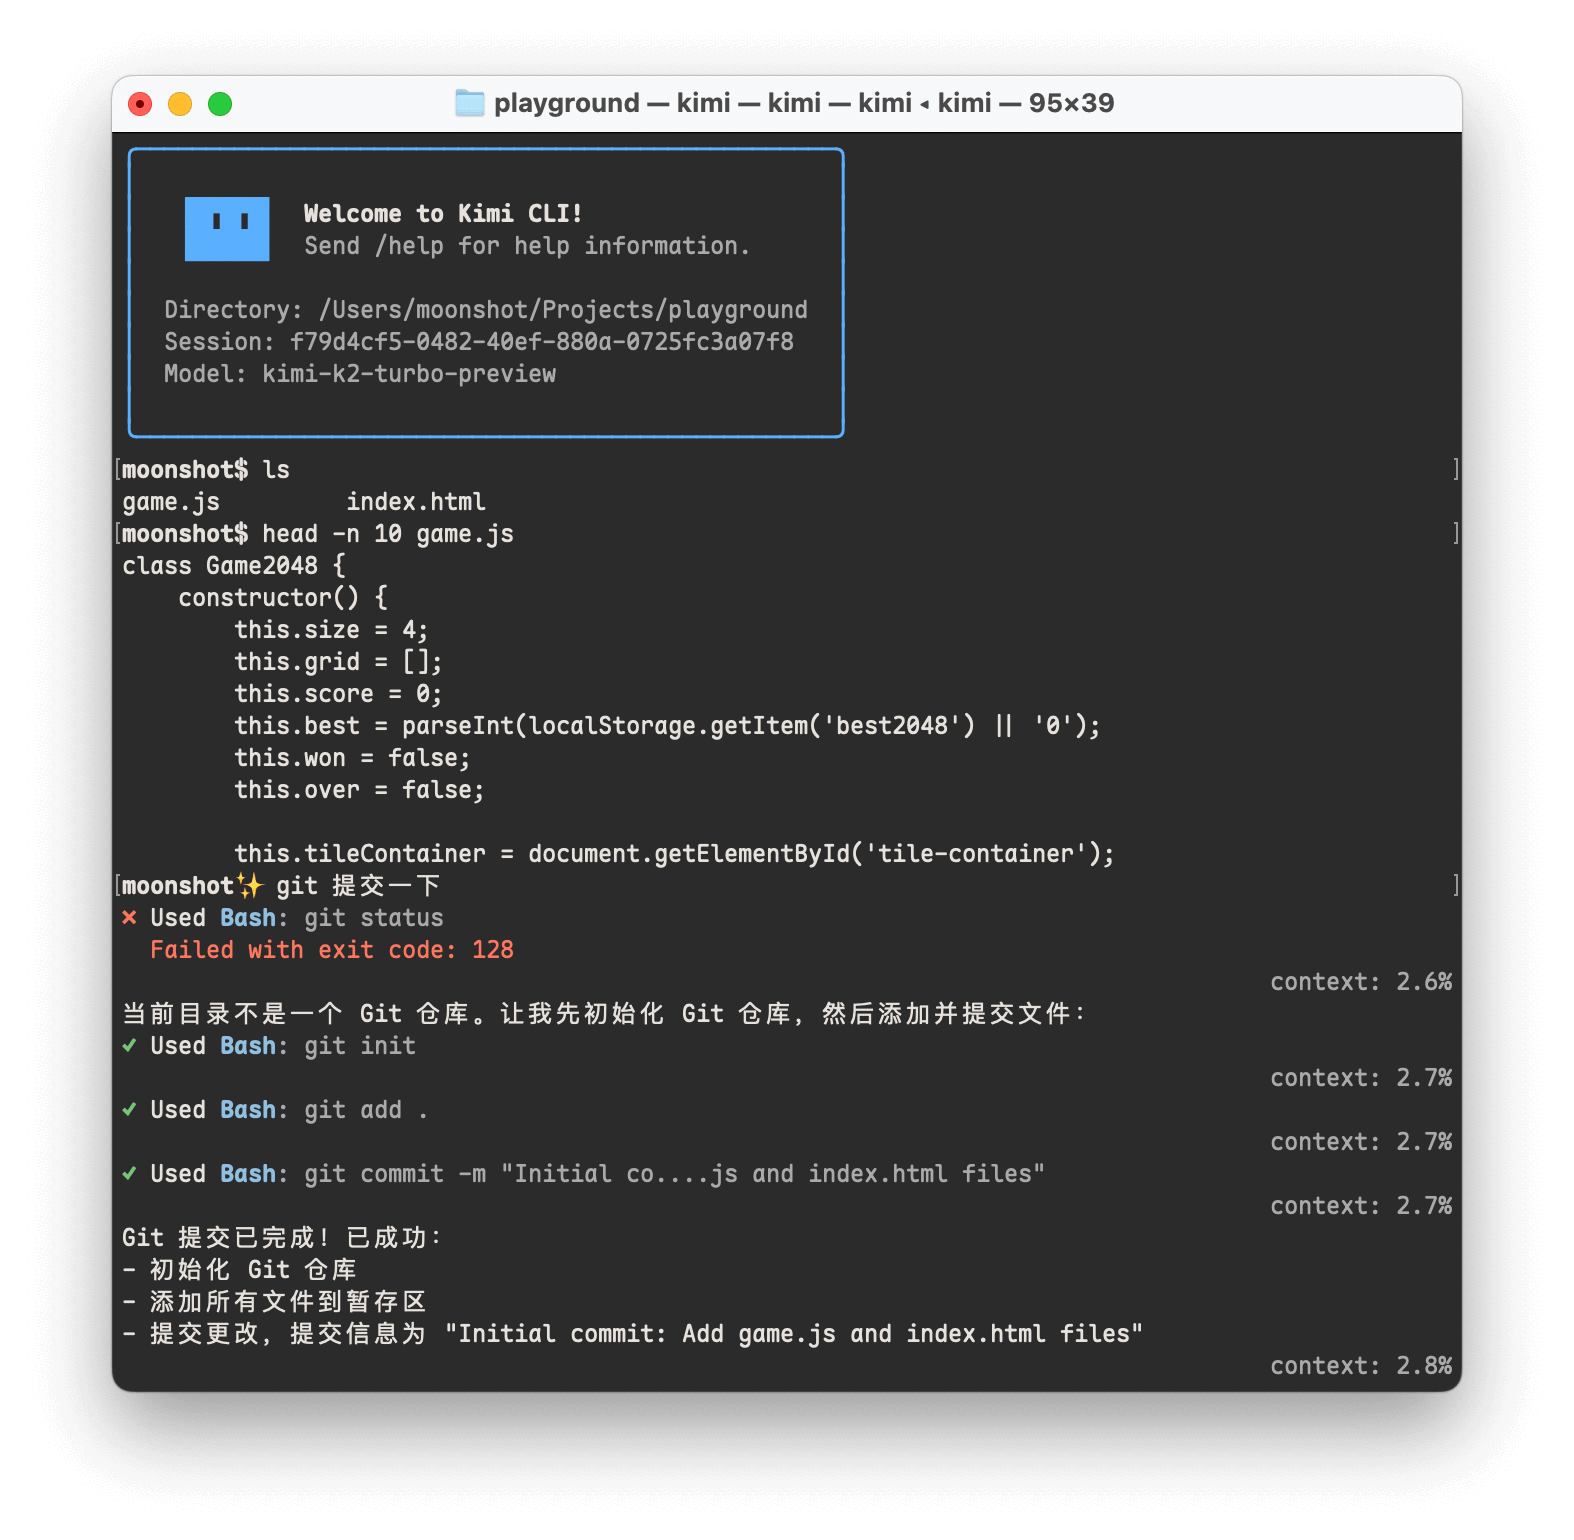
Practical Application Scenario: After generating code with Kimi CLI, immediately switch to Shell mode to run test commands, verify code functionality, then return to continue development. This seamless switching significantly enhances development efficiency.
Development Environment Integration
Using with Zsh:
Zsh users can integrate zsh-kimi-cli plugin for quick Kimi CLI access within shell.
Installation method (oh-my-zsh example):
git clone https://github.com/MoonshotAI/zsh-kimi-cli.git \
  ${ZSH_CUSTOM:-~/.oh-my-zsh/custom}/plugins/kimi-cli
Then enable plugin in ~/.zshrc:
plugins=(... kimi-cli)
After restarting Zsh, access Kimi CLI mode via Ctrl-K in Zsh:

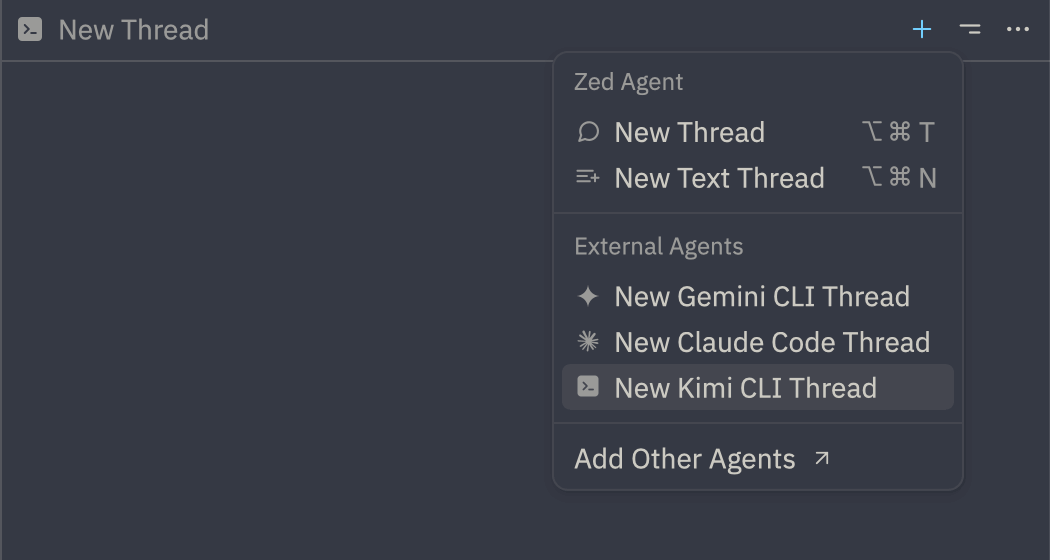
Using with Zed Editor:
Kimi CLI natively supports Agent Client Protocol, compatible with any ACP client like Zed Editor.
To use Kimi CLI in Zed, first ensure proper Kimi CLI installation and configuration, then add following content to Zed configuration file (~/.config/zed/settings.json):
{
  "agent_servers": {
    "Kimi CLI": {
      "command": "kimi",
      "args": ["--acp"],
      "env": {}
    }
  }
}
Subsequently create Kimi CLI Thread in Zed sidebar:
Integrating MCP Tools
Kimi CLI supports widely adopted MCP configuration format for specifying MCP tools. Example:
{
  "mcpServers": {
    "context7": {
      "url": "https://mcp.context7.com/mcp",
      "headers": {
        "CONTEXT7_API_KEY": "YOUR_API_KEY"
      }
    },
    "chrome-devtools": {
      "command": "npx",
      "args": ["-y", "chrome-devtools-mcp@latest"]
    }
  }
}
Specify MCP configuration file path during startup via --mcp-config-file parameter:
kimi --mcp-config-file /path/to/mcp.json
Real-World Application Scenarios and Best Practices
This section answers: How is Kimi For Coding applied in actual development scenarios?
Understanding technical principles matters, but knowing how to apply these tools in real projects is crucial. Below are typical application scenarios based on Kimi For Coding capabilities, demonstrating how to integrate these tools into daily development workflows.
Scenario 1: Rapid Prototyping
When validating ideas or creating project prototypes, Kimi For Coding significantly accelerates the process. For example, creating a simple weather query application using Kimi CLI:
-
Launch Kimi CLI in project directory: kimi -
Describe requirements: “Create a web application displaying current city weather with temperature, conditions, and icons” -
Kimi CLI guides technology stack selection (HTML/CSS/JavaScript or React) -
Generates basic code structure including necessary API calls and UI components -
Request additional features like city search or weather forecasts
Scenario 2: Code Optimization and Refactoring
When inheriting legacy projects or optimizing existing code, Kimi For Coding provides valuable assistance. For example, in Roo Code:
-
Open code files requiring optimization -
Select code blocks needing improvement -
Request code review and optimization suggestions via Roo Code panel -
Implement improvements based on suggestions: performance enhancement, error handling, or code readability
Scenario 3: Learning New Technology Stacks
When learning new programming languages or frameworks, Kimi For Coding serves as your personal programming mentor. For example, learning Python data analysis:
-
Set up Kimi For Coding in Claude Code -
Ask: “How to process CSV files using pandas and calculate basic statistics?” -
Receive detailed code examples and explanations -
Inquire about advanced features like data visualization or machine learning integration
Scenario 4: Debugging and Problem Resolution
When encountering tricky bugs or technical issues, Kimi For Coding offers alternative perspectives. For example:
-
Describe encountered problems and error information in Kimi CLI -
Provide relevant code snippets -
Receive potential solutions and debugging suggestions -
Implement suggestions and verify effectiveness
Personal Reflections and Usage Insights
This section answers: What valuable experiences and lessons emerge from practical Kimi For Coding usage?
Through extensive use of Kimi For Coding features, I’ve accumulated valuable experiences and insights. These reflections, based on actual usage scenarios, aim to help other developers utilize this tool more effectively.
Configuration Process Lessons:
Initially configuring Claude Code, I overlooked environment variable persistence. After terminal sessions ended, environment variable settings were lost, requiring reconfiguration for subsequent uses. The solution involved adding these configurations to shell configuration files (.bashrc or .zshrc), automatically setting required environment variables upon each terminal launch. This simple technique saved significant repetitive configuration time.
Quota Management Wisdom:
Kimi For Coding employs periodic quota refresh mechanisms, requiring developers to strategically use request counts. I discovered that allocating quotas primarily for complex, highly repetitive programming tasks—rather than simple code completion—maximizes value. For instance, using it for system architecture design, complex algorithm writing, or test case generation proves more valuable than basic syntax checking.
Tool Selection Strategy:
Different tools offer distinct advantages and applicable scenarios. Kimi CLI suits project-level tasks and system design; Roo Code excels in daily coding assistance within VS Code; Claude Code performs excellently in command-line environments. I typically select the most appropriate tool based on current task nature: using Kimi CLI for initial project infrastructure, Roo Code for real-time coding assistance, and Claude Code for quick script writing in server environments.
Prompt Engineering Value:
Interaction quality with Kimi For Coding largely depends on requirement description. I found that providing clear, specific context and constraints yields more accurate assistance. For example, instead of saying “Help me write a function,” specify “Write a Python function for user input validation checking email format and password strength, returning appropriate error messages.” Such specific descriptions guide AI to generate more requirement-aligned code.
Integration Development Insights:
Deeply integrating Kimi For Coding into development workflows—rather than treating it as an external tool—delivers maximum benefits. I habitually keep Kimi CLI or Roo Code open during development, using them as thinking partners and code reviewers. This continuous collaborative relationship enhances code quality and development efficiency more effectively than occasional consultations.
Technical Preview Stage Understanding:
Kimi CLI currently remains in Technical Preview phase, meaning potential imperfections exist. During practical use, I encountered unexpected behaviors or limitations. However, through official feedback channels (GitHub issues), I could report problems and observe rapid improvements. This open attitude fosters confidence in the tool’s future development.
Conclusion
Kimi For Coding provides individual developers with a powerful and flexible AI programming assistance ecosystem. Through three primary tools—Kimi CLI, Claude Code, and Roo Code—developers access intelligent programming support within their preferred environments. Whether for rapid prototyping, code optimization, technical learning, or problem debugging, this service offers valuable assistance.
Crucially, developers should understand service applicability (personal development scenarios), pricing mechanisms (included in membership packages), and usage specifications (only on approved platforms). Through proper configuration and effective usage, Kimi For Coding becomes an essential tool for enhancing personal development efficiency.
As AI programming assistance technology continuously evolves, these tools will keep advancing, providing developers with increasingly intelligent and efficient support. Mastering current usage methods while staying informed about technological developments maintains developer competitiveness in this rapidly changing field.
Practical Summary and Action Checklist
Quick Configuration Guide
-
Obtain API Key
-
Log into Kimi membership page -
Generate dedicated Coding API Key
-
-
Environment Selection and Installation
-
Kimi CLI: Install via uv tool, ideal for project-level tasks -
Claude Code: Install via npm, suitable for command-line workflows -
Roo Code: Install as VS Code extension, ideal for integrated development environments
-
-
Basic Configuration
-
Set correct base_url: https://api.kimi.com/coding/ -
Configure API Key and model: kimi-for-coding -
Verify configuration status
-
Best Practices Checklist
-
Reasonably distribute usage frequency within quota cycles -
Select most appropriate tools based on task nature -
Provide clear, specific requirement descriptions -
Persist configurations to shell environment -
Promptly feedback usage issues -
Strictly adhere to usage scope and policies
One-Page Overview
Core Value: AI-driven personal programming assistant enhancing development efficiency
Supported Platforms:
-
Kimi CLI (official command-line tool) -
Claude Code (Anthropic environment) -
Roo Code (VS Code extension)
Pricing Model: Included in membership packages, periodic quota refreshes
Applicable Scenarios: Personal development, learning, prototype creation, code optimization
Key Configuration:
-
Base URL: https://api.kimi.com/coding/ -
Model: kimi-for-coding -
Authentication: Membership-specific API Key
Frequently Asked Questions (FAQ)
Can Kimi For Coding be used for enterprise projects?
No, this service is explicitly limited to personal development scenarios. Enterprise requirements should use Moonshot Open Platform, supporting prepaid pay-as-you-go models and specific model selection.
What happens after quota exhaustion?
After quota exhaustion, service becomes unavailable until next refresh cycle (typically weekly). Reasonably plan usage frequency to ensure adequate quota during critical development phases.
Can the same API Key be used simultaneously across multiple environments?
Yes, but total request counts share the same quota pool. Usage across different environments cumulatively consumes request counts within the package.
Why can’t I connect after configuration?
Check: API Key copied completely, base_url accurately set to https://api.kimi.com/coding/, network connection normal. Try regenerating API Key.
Why does Kimi CLI start slowly on macOS?
This is normal due to macOS security mechanisms. Try adding terminal tools to “System Settings” – “Privacy & Security” – “Developer Tools,” or patiently wait for initial security checks.
How to ensure configurations persist after terminal restart?
Add environment variable settings to shell configuration files (.bashrc, .zshrc, or PowerShell profiles), automatically loading configurations upon each terminal launch.
Which programming languages does Kimi For Coding support?
Based on its universal design, it should support multiple mainstream programming languages. Specific capabilities can be understood by trying different language requests during usage.
How to provide feedback for technical issues?
For Kimi CLI issues, submit feedback via GitHub repository’s issue page. For service-related problems, contact official support channels.

