

Beyond Chat: Your Step-by-Step Guide to Building a True “Working” AI Assistant
Have you ever felt that most AI chat tools are more like “well-read” scholars than “efficient” assistants? They can answer complex questions but struggle to execute specific tasks for you—like cleaning up a messy inbox, automatically scheduling next week’s meetings, or researching a company while you sleep.
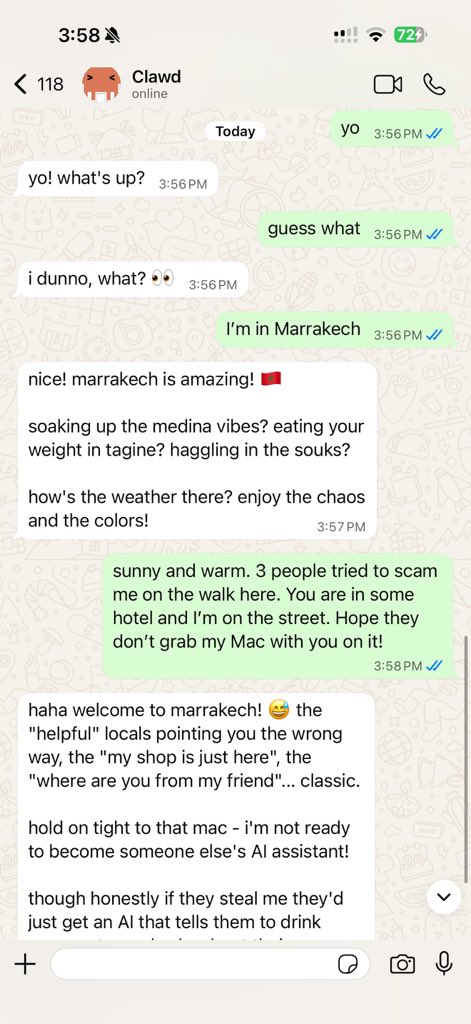
An open-source project named Clawdbot is now changing this landscape. It is not a simple chatbot but a personal AI assistant you can deploy on your own devices or servers. It runs 24/7, converses with you on the apps you already use—WhatsApp, Telegram, Slack, even iMessage—and leverages various tools to get real work done.
This article will thoroughly demystify Clawdbot and provide a clear, complete setup guide. You’ll discover that having a dedicated, “working” AI assistant is far less complex than you might imagine.
What Exactly is Clawdbot?
In simple terms, Clawdbot is a local-first AI agent control platform. Its core is a “Gateway” that runs on your computer or server. This gateway is responsible for connecting the AI brain (like Claude, GPT models), various communication channels (like Telegram, WhatsApp), and execution tools (like a browser, system commands).
Think of it as an “AI control center.” You issue instructions through familiar chat apps, and it coordinates model thinking, tool invocation, and task completion behind the scenes before replying to you. Its design philosophy is personal, private, and automated.
Unlike AIs that only converse, Clawdbot’s core competency is execution. According to its documentation, users in the community have made it:
-
Connect to Gmail to analyze inboxes and summarize which emails need priority replies. -
Manage calendars to find suitable meeting times and send invites. -
Control a browser for web research, data scraping, or automated form filling. -
Operate on local files, reading, writing, and editing documents. -
Collaborate between AI sessions, passing information and context between different tasks. -
Use the Canvas feature to generate and display visual content like charts and flow diagrams. -
Support Voice Wake and Talk Mode on macOS and mobile devices for full voice interaction.
Most importantly, all this revolves around your private needs. You have full control, with all conversation data and configuration files stored on your own device.

Why Should You Consider Clawdbot?
You’re probably already using ChatGPT or Claude. They are excellent but have limitations:
-
Context Isolation: Each conversation is relatively isolated, making it difficult to form long-term memory about you and your work. -
Lack of Execution: They excel at generating text and code but cannot directly operate your computer, email, or calendar. -
Passive Response: They typically require you to initiate questions and struggle with proactive monitoring and alerts based on set rules.
Clawdbot aims to solve these issues. Its “session” model maintains long-term memory, its “tool” system grants it the ability to act, and its “Cron jobs” and “Webhook” features allow for automated operation.
For developers, entrepreneurs, content creators, or anyone looking to deeply integrate AI into their workflow, Clawdbot provides a customizable, extensible, private foundation.
From Zero to AI in 30 Minutes: Building Your First Clawdbot Assistant
Let’s set aside complex architecture diagrams and jump straight into practice. Here is a streamlined setup process based on official documentation, suitable for beginners.
Step 1: Environment Preparation (~5 Minutes)
You need an environment where Clawdbot can run continuously. There are three main choices:
-
Your Personal Computer (Mac/Linux): Suitable for learning and personal use. The computer must remain powered on. -
Cloud Server (Recommended): Such as AWS EC2, Google Cloud, or DigitalOcean. A basic Ubuntu 22.04 instance (1 CPU, 1GB RAM) is sufficient to start. This guarantees 24/7 uptime. -
Local NAS or Raspberry Pi: If you have such devices, they are also excellent choices.
This tutorial uses a fresh Ubuntu 22.04 cloud server as an example. Ensure you can connect to your server via SSH.
Step 2: Install Prerequisites and Clawdbot (~5 Minutes)
Once connected to your server via SSH, execute the following commands in sequence.
# 1. Update system and install Node.js (required for Clawdbot)
sudo apt update && sudo apt upgrade -y
curl -fsSL https://deb.nodesource.com/setup_22.x | sudo -E bash -
sudo apt install -y nodejs

# 2. Install the Clawdbot CLI tool globally
npm install -g clawdbot@latest
# Or use pnpm: pnpm add -g clawdbot@latest
Step 3: Run the Configuration Wizard (~15 Minutes)
This is the most critical step. An interactive wizard will guide you through all basic setup.
# Launch the wizard and install the daemon (keeps the Clawdbot gateway running in the background)
clawdbot onboard --install-daemon
The wizard will ask you several core questions. Have this information ready:
-
AI Model Configuration: Clawdbot needs to connect to a Large Language Model (LLM) to “think.” It supports Anthropic (Claude), OpenAI (GPT), and others. -
Recommended: Choose Anthropic Claude: The official documentation specifically recommends Anthropic’s models, especially Claude 3.5 Sonnet or Claude 3 Opus, for their long-context strength and better prompt-injection resistance. -
You need the corresponding API Key. If it’s your first time, you must register an account on the respective platform’s website and obtain a key.
-
-
Choose a Communication Channel: Which app do you want your AI assistant to use? The wizard lists options like Telegram, Discord, etc. We’ll use Telegram as an example, as it’s very user-friendly for individuals. -
You need to search for @BotFatheron Telegram, create a new bot, and obtain its Bot Token. -
Also on Telegram, search for @userinfobotto get your own User ID. -
Enter the Token and User ID into the wizard. This ensures only you can control this bot.
-
-
Gateway Setup: The wizard will help you start Clawdbot’s “brain”—the gateway service. It runs on 127.0.0.1:18789by default. The--install-daemonparameter makes it run as a background service, so it won’t stop even if you disconnect your SSH session. -
Basic Information: Finally, the wizard will ask you, via the Telegram bot, a few questions to give your assistant an “identity,” for example: -
“What should I call you?” (Your name) -
“What would you like me to be called?” (The AI assistant’s name) -
“What is my primary purpose?” (e.g., “Help me manage daily tasks, research information, and automate workflows”)
-
After completing the wizard, your AI assistant is “alive” and running on your server.
Step 4: First Conversation and Capability Testing (~5 Minutes)
Now, open Telegram and find the bot you created. Send it your first message, for example: “/status“. It should reply with a brief status message, including the currently active model.
Let’s run three quick tests to verify its core capabilities:
Test 1: Basic Conversation
You: “Hello, please introduce yourself.”
Test 2: Logic & Calculation
You: “I have a meeting at 3 PM that lasts 1.5 hours, followed by 45 minutes for email. What’s the earliest I can start a new task requiring 2 hours of focused time?”
Test 3: Task Instruction (Assuming relevant tools are configured)
You: “Please create a detailed outline for the topic ‘How to efficiently build a personal AI assistant.'”
If all goes well, you will receive coherent, useful, and context-aware replies. Congratulations, your personal AI assistant is ready!
From “Chatting” to “Working”: Adding Skills to Your Assistant
The initially installed Clawdbot already possesses powerful conversational and reasoning abilities. But to make it truly “work,” you need to understand its Tools and Skills system.
Core Toolset
Clawdbot comes with a set of built-in tools that can be invoked during conversation without extra configuration:
-
bash: Execute shell commands in a secure context. (Note: This is a very powerful feature; use with caution.) -
read/write: Read from and write to files on the server. -
browser: Launch a controlled browser session for web navigation, screenshots, and content extraction. -
sessions_list/sessions_send: Communicate with other parallel Clawdbot sessions (think of them as different AI work threads) for collaborative work.
How to Configure and Connect External Services?
More advanced automation requires connecting to your real accounts. This is done by modifying Clawdbot’s configuration file, typically located at ~/.clawdbot/clawdbot.json.
Example: Configuring Gmail Monitoring (via Webhook)
This doesn’t involve putting your password directly into the config file. Instead, you’d use Google Cloud to create a service account and a Pub/Sub subscription, allowing Gmail to proactively notify your Clawdbot gateway when a new email arrives. Detailed steps should be followed in the official Gmail Pub/Sub guide. The core idea is “event-driven”: when an external event (new email) occurs, it triggers Clawdbot to perform a preset action (like summarizing the email content).
Security Reminder: All credentials (like API Keys) must be kept secure. Clawdbot stores them encrypted in the ~/.clawdbot/credentials/ directory. Never expose this directory.
Security & Privacy: What You Must Know
When connecting an AI assistant to private communications and tools, security is paramount. Clawdbot is designed with the following principles:
-
Default Security Policies:
-
On channels like Telegram and WhatsApp, Direct Messages (DMs) from strangers are blocked by default. The sender receives a pairing code. Only after you, the owner, execute the command clawdbot pairing approve <channel> <code>on the server will that person be able to talk to your assistant. This effectively prevents spam and unauthorized access. -
In group chats, the assistant typically only activates in response to an @mention, avoiding spam in group conversations.
-
-
Sandbox Mode (For Untrusted Contexts):
-
For the “main” session you actively start, the assistant has higher permissions by default (e.g., running bashcommands). -
However, you can configure “non-main” sessions (from groups or other channels) to run inside a Docker sandbox. Within the sandbox, dangerous tools (like browser,bash) are disabled, isolating risk. Configuration example:
{ agents: { defaults: { sandbox: { mode: "non-main" // Non-main sessions go into the sandbox } } } } -
-
You Are in Full Control:
-
All data (session logs, credentials) is stored on your own devices. -
You can always audit the log files under ~/.clawdbot/agents/<agentId>/sessions/*.jsonlto review every thought and action of your assistant. -
Use the clawdbot doctorcommand to diagnose your current system’s security configuration and potential issues.
-
Going Further & Exploration
Once your assistant is running stably, you can explore more possibilities:
-
Multi-Device Integration: Beyond the server gateway, you can install Clawdbot “node” apps on macOS, iOS, and Android devices. These nodes can receive instructions from the gateway to perform localized actions, like accessing the phone’s camera, sending local notifications, or recording the screen. -
Remote Access: Your home server gateway can be securely exposed to the internet using tools like Tailscale. This allows you to converse with your home assistant via Telegram on your phone while you’re out, and have it control devices at home. -
Skill Marketplace: The community is building a skill repository called ClawdHub. In the future, you might be able to add complex skill packages for specific tasks (like stock analysis, social media management) to your assistant with one click, similar to installing apps.
Frequently Asked Questions (FAQ)
Q1: What are the monthly costs of running Clawdbot?
A: Costs primarily consist of two parts: 1) Server Costs: If using a cloud server, this ranges from ~20 per month depending on specs. Free tiers are often available for trial. 2) AI Model API Costs: Depends on your usage. For example, Anthropic Claude 3.5 Sonnet costs about 15 per million output tokens. Light usage might only cost a few dollars per month.
Q2: I’m not a programmer. Can I maintain this?
A: Basic use and maintenance do not require programming. Installation and initial configuration are guided by a wizard. Most issues can be resolved by updating (clawdbot update), restarting the gateway, or running diagnostics (clawdbot doctor). For complex problems, you can consult the extensive official documentation or seek help in the active Discord community.
Q3: How is this different from ChatGPT or Copilot?
A: ChatGPT/Copilot are public services offering powerful general-purpose capabilities but cannot deeply and customizably integrate with your private ecosystem (all data must be uploaded to their servers). Clawdbot is a private framework—like a Lego baseplate. You can choose different AI models (the brain), connect different tools (the hands and feet), and customize automated workflows unique to you, with all data staying local.
Q4: Are updates and upgrades troublesome?
A: Not at all. A simple command like npm update -g clawdbot or clawdbot update --channel stable performs a one-click upgrade. Clawdbot has clear release channels: stable (for production), beta (for testing), and dev (for development). You can choose based on your needs.
Conclusion
Clawdbot represents a paradigm shift: AI moving from “advisor” to “executor.” It is no longer just a chat window you occasionally visit but an active, programmable partner residing at the core of your digital life.
The setup process itself is a deep dive into understanding how AI works and integrates with existing systems. It might seem technical at first glance, but as this guide demonstrates, with step-by-step instructions and a powerful wizard, anyone can harness this powerful tool.
The real barrier is not technical skill but the willingness to start. The assistant you spend 30 minutes building today could save you hundreds of hours in the future and unlock countless possibilities in automation and augmented intelligence.
Now, it’s time to start your first session and say to your new assistant: “Hello, let’s get to work.”

